Hello my Crafty Friends! Meraj here !
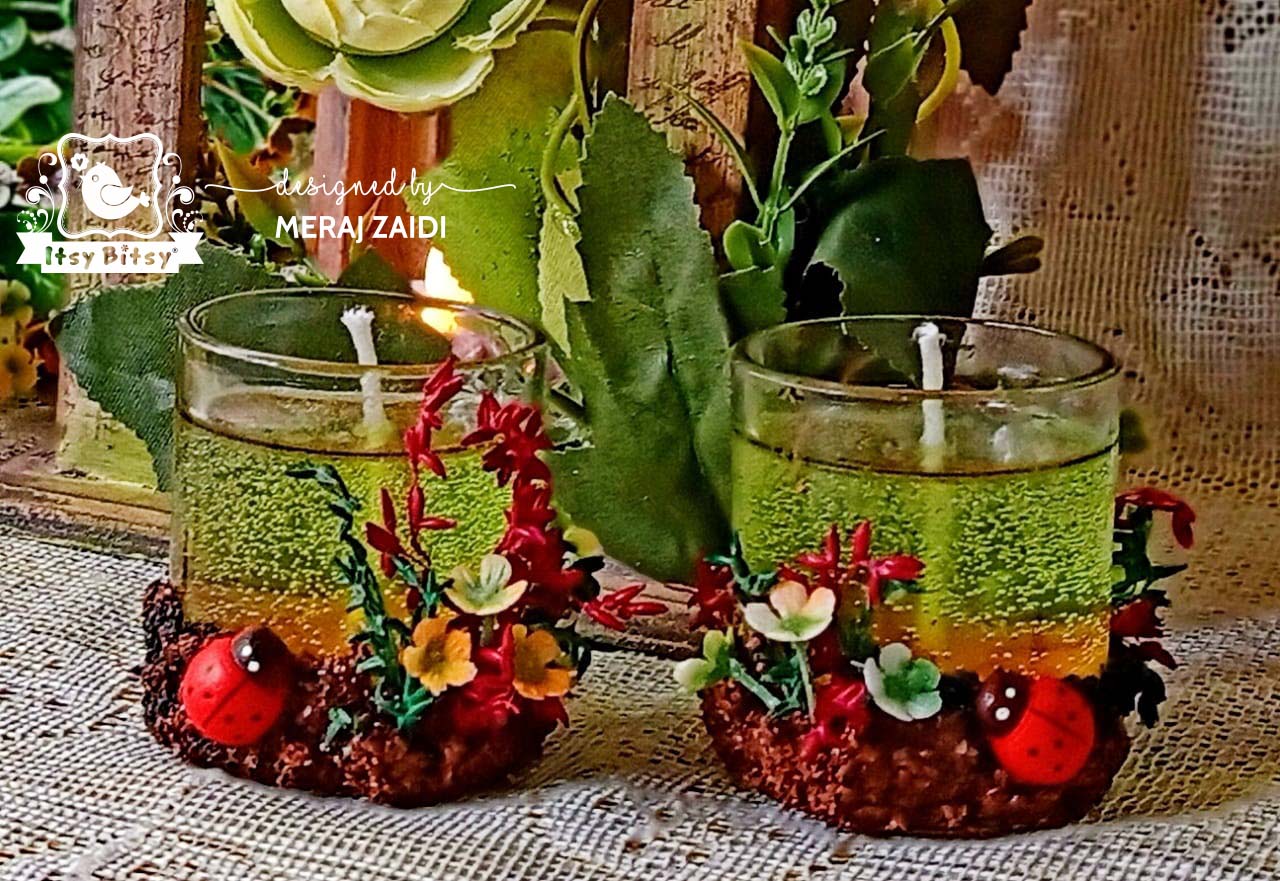
I am sure you all must be busy preparing for the Diwali celebrations that brings in with it so much happiness and joy. Gifting each other is one of the many adorable gestures one sees during this season. Many a time we all get lost in the confusion of what to gift especially to the most special people in our lives. And I am sure the idea of creating something handcrafted does not only bring the smiles on the giver and reciever's faces , but along with it, it also conveys the message of how special that person is to you because when you create something handmade, it is filled with so much love and thoughtfulness for the person you are making it for. Nothing can compare to a handmade gift made with love, its priceless. Inspired by this Idea of gifting I incorporated Little Birdie's Stone Texture Paste into a Gel Candle that can be made so easily using the awesome supplies from Itsy Bitsy.
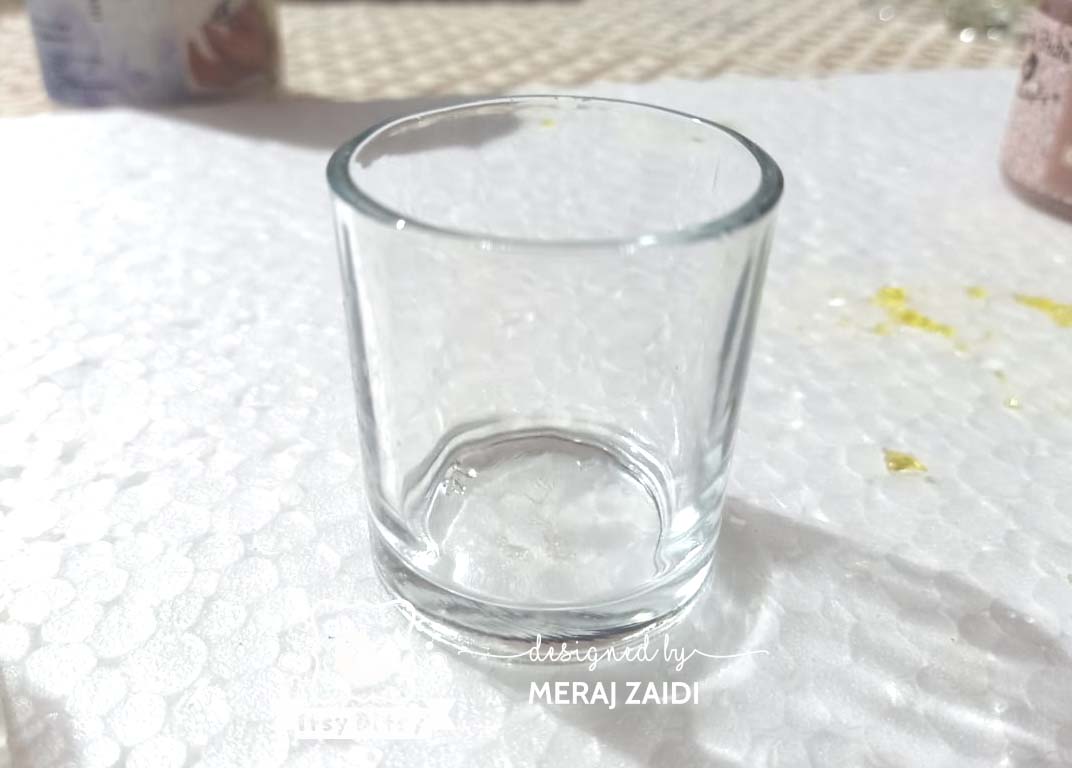
So here we go! To start making a Gel Candle, choose a glass container of your choice. There are lots of designs and shapes available in IB physical stores.
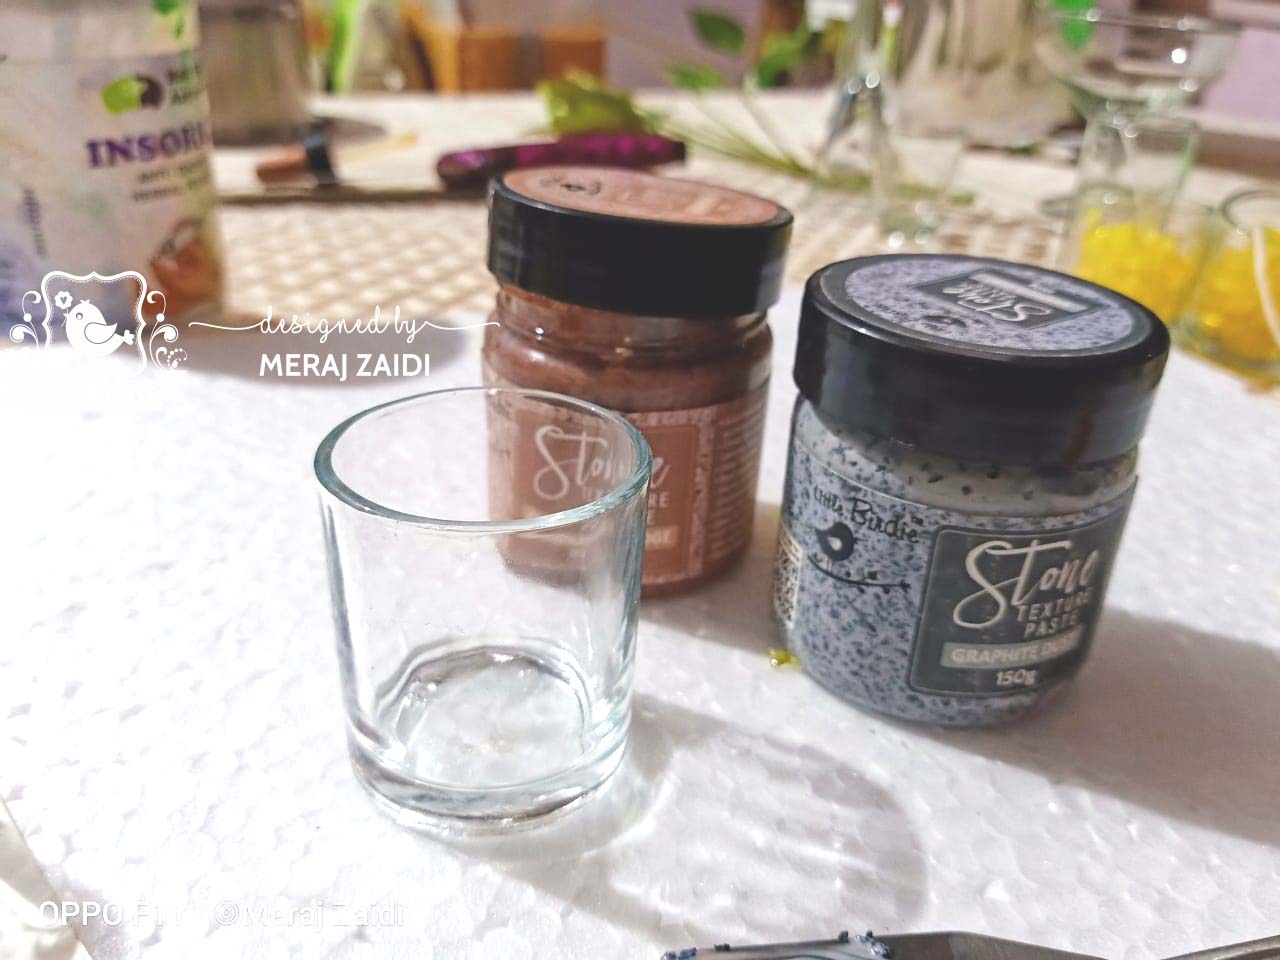
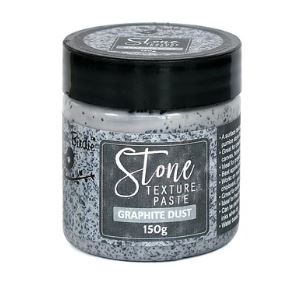
I have taken two colors of Stone Texture Pastes. The description is in the material list down the post below.
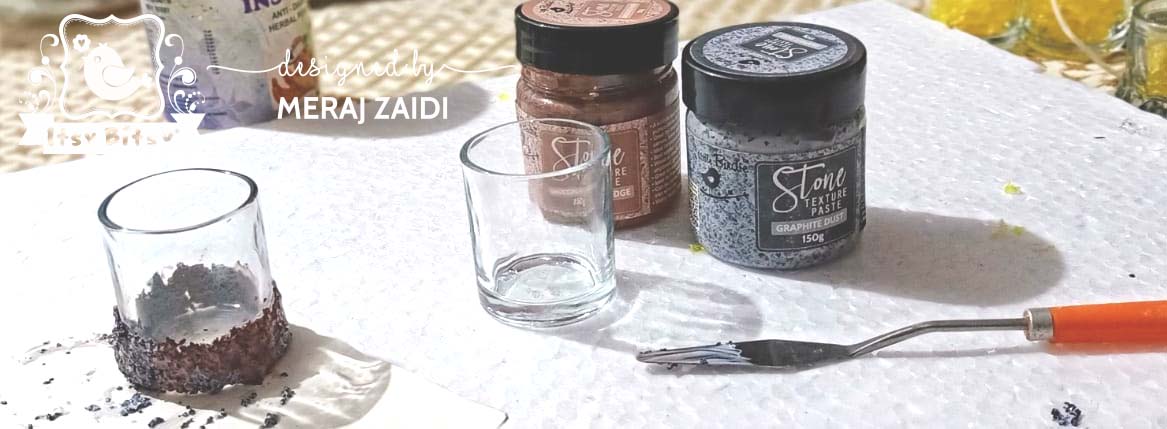
With a spatula start applying the StoneTexture Paste on the base of the glass. Apply both the colors overlapping each other in some places. Load your spatula generously and apply thick coats of it.
Before the Stone Texture Paste dries up, take some dry ferns, cut them into small parts and quickly insert them into the layers of Stone Texture Pastes. Dry fern is also available in IB physical stores.
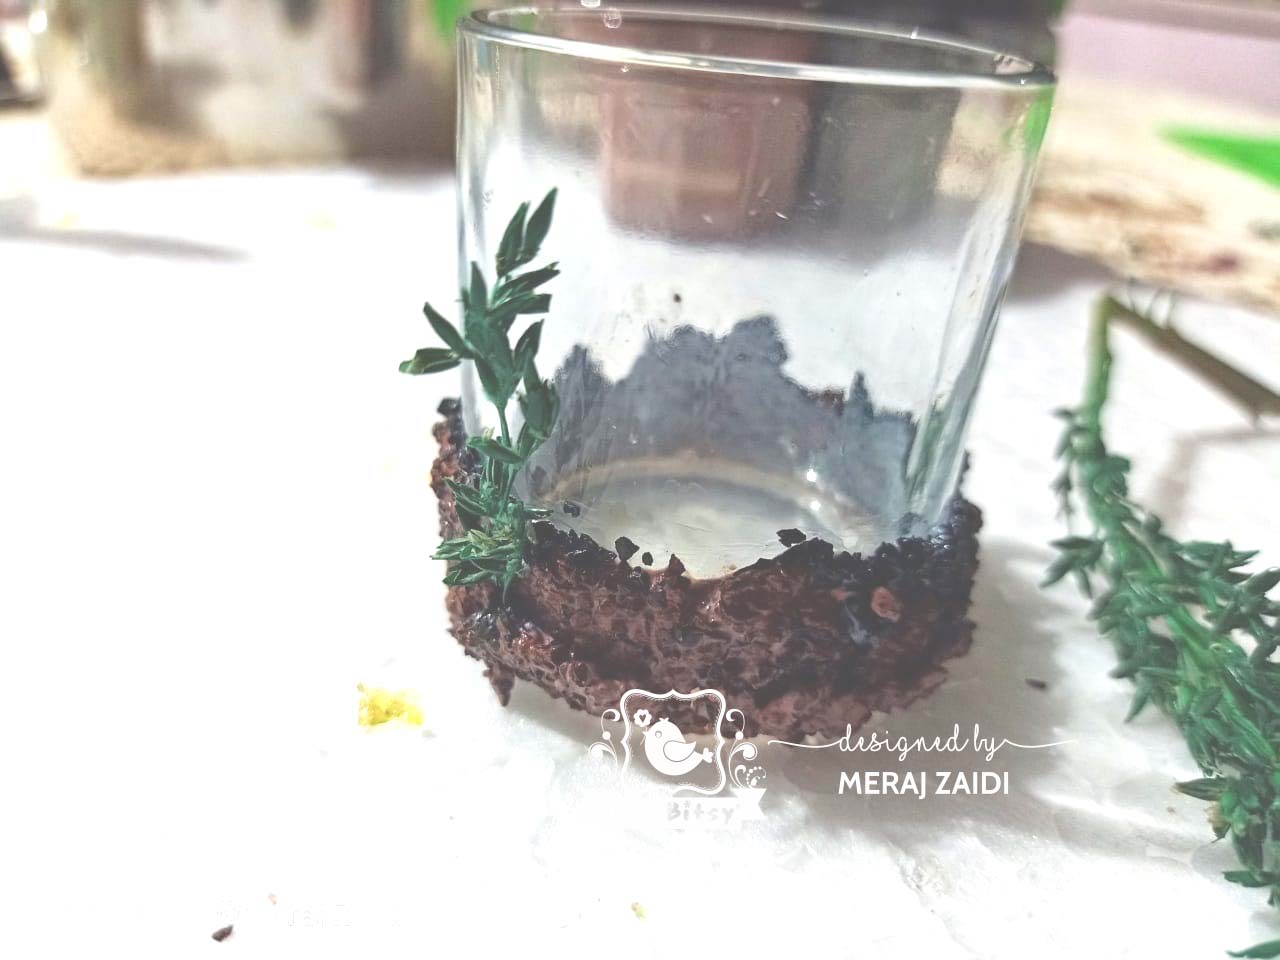
Stone Texture Paste dries very hard and hence is very sturdy and strong and will hold the ferns very firmly.
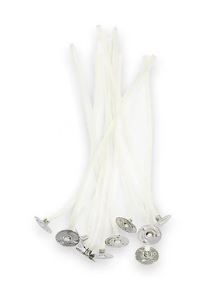
Then take a wax coated wick, apply glue at its base and adhere it in the center of the glass base as shown in the picture below.
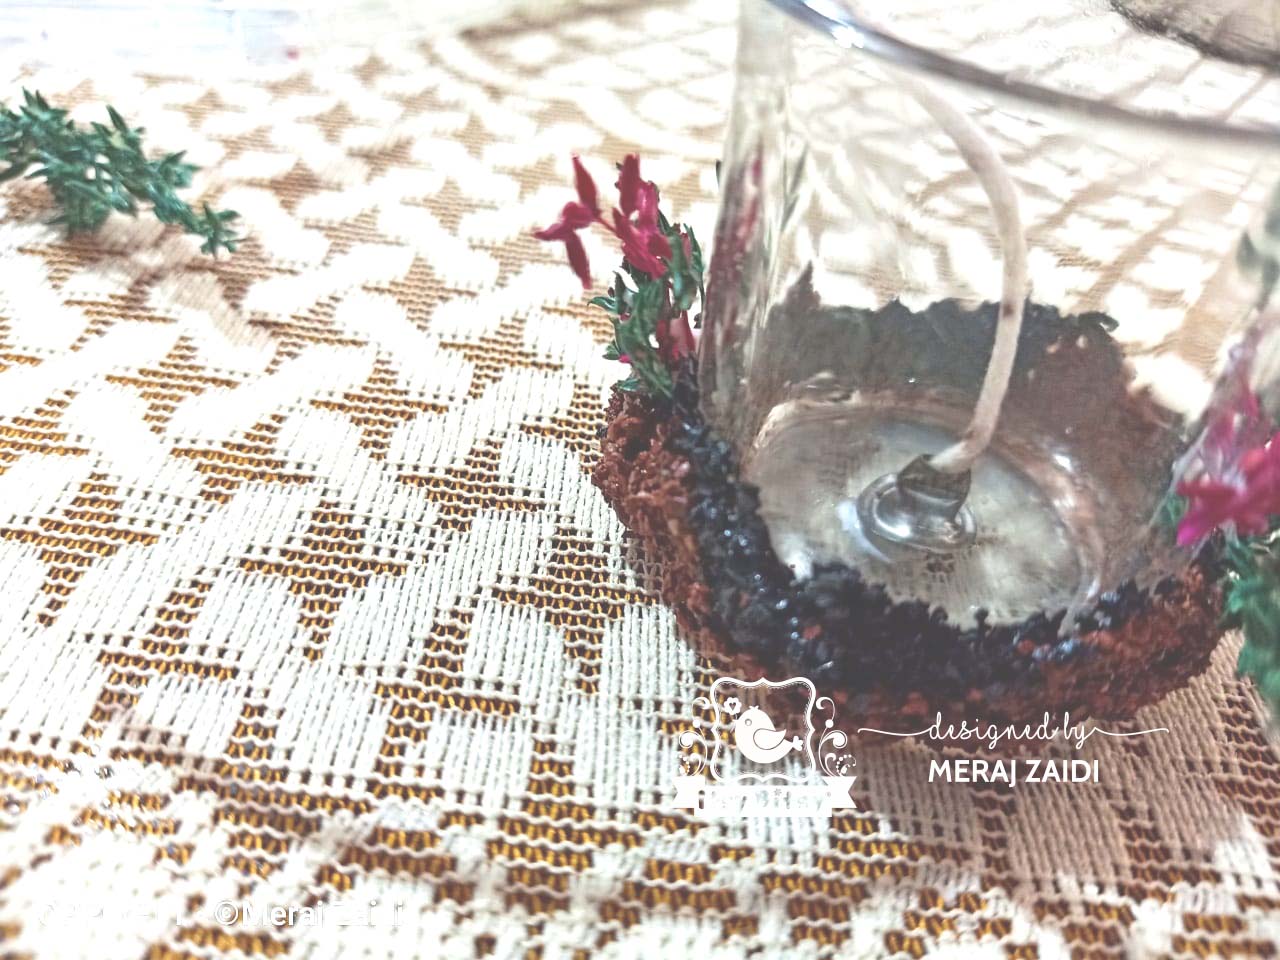
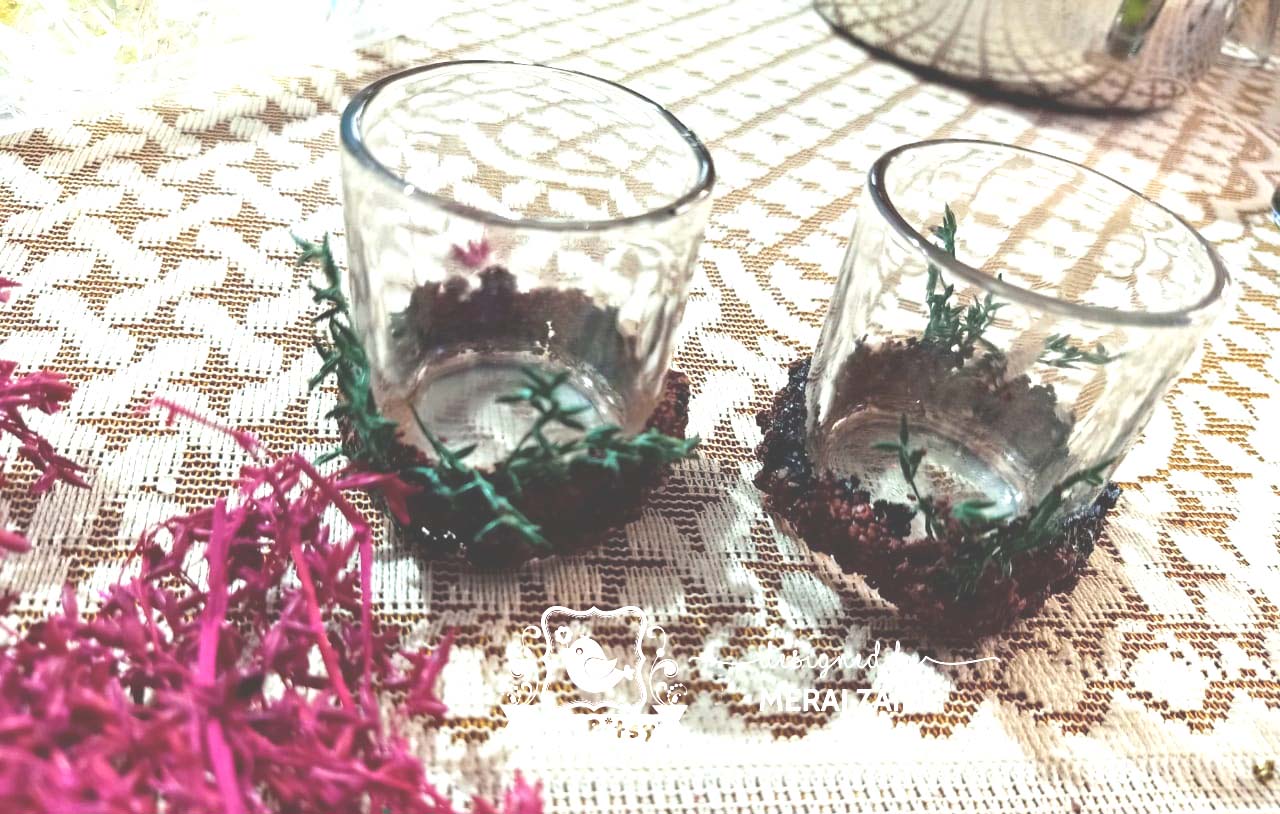
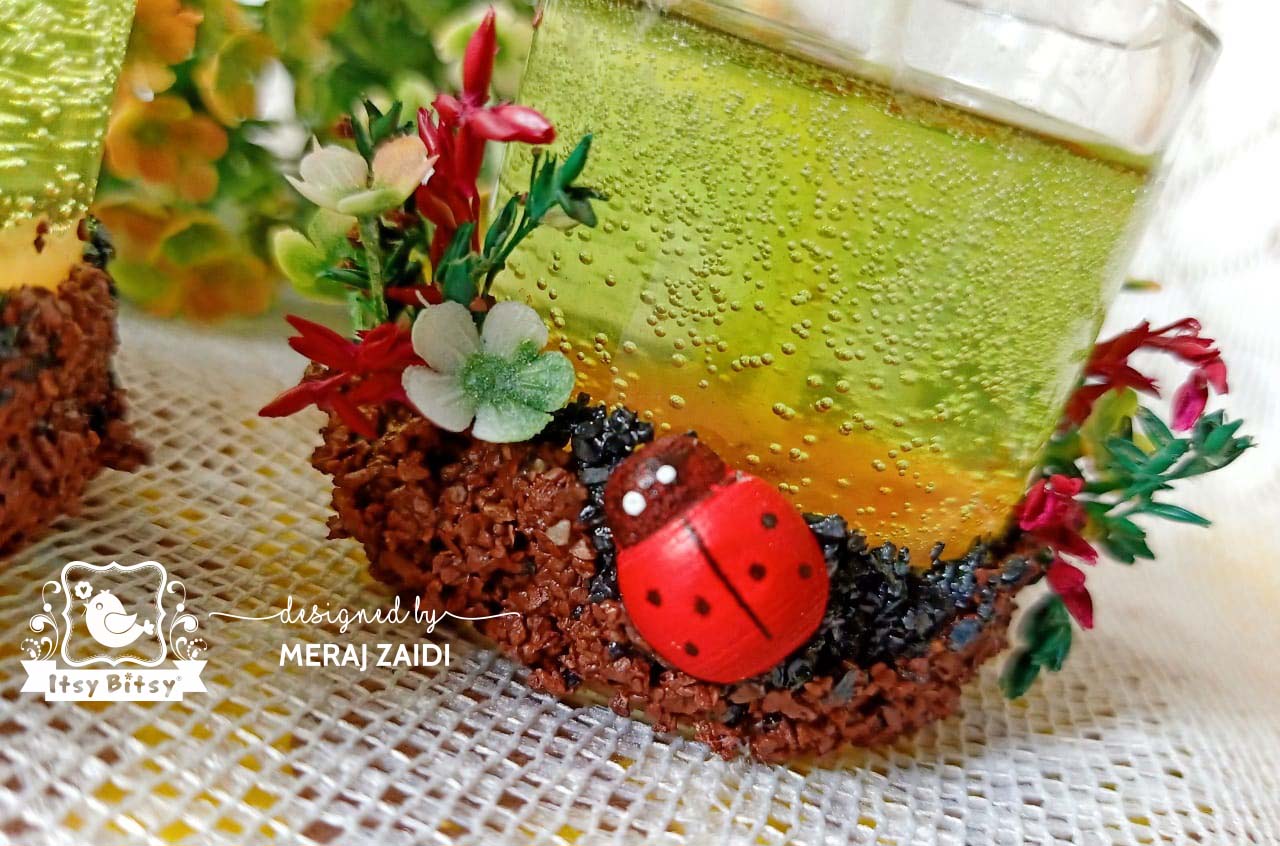
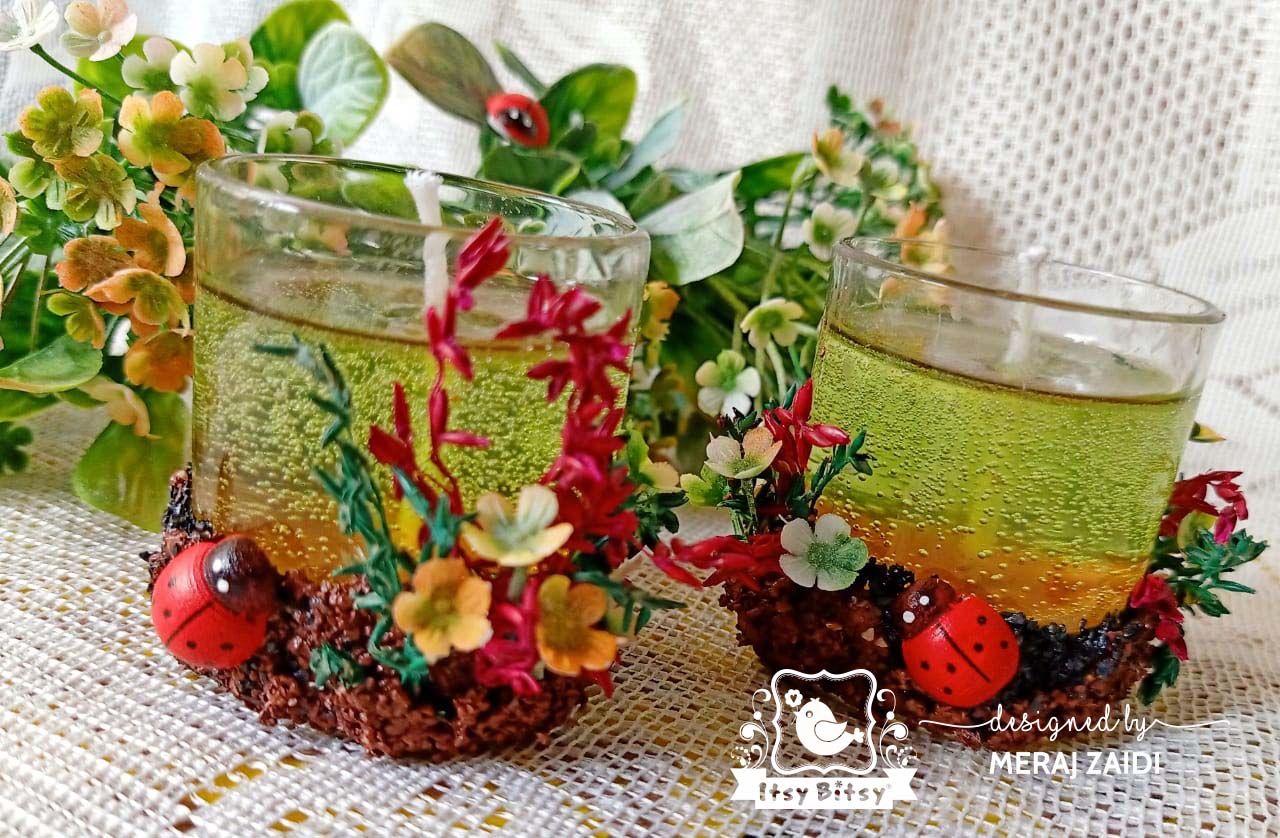
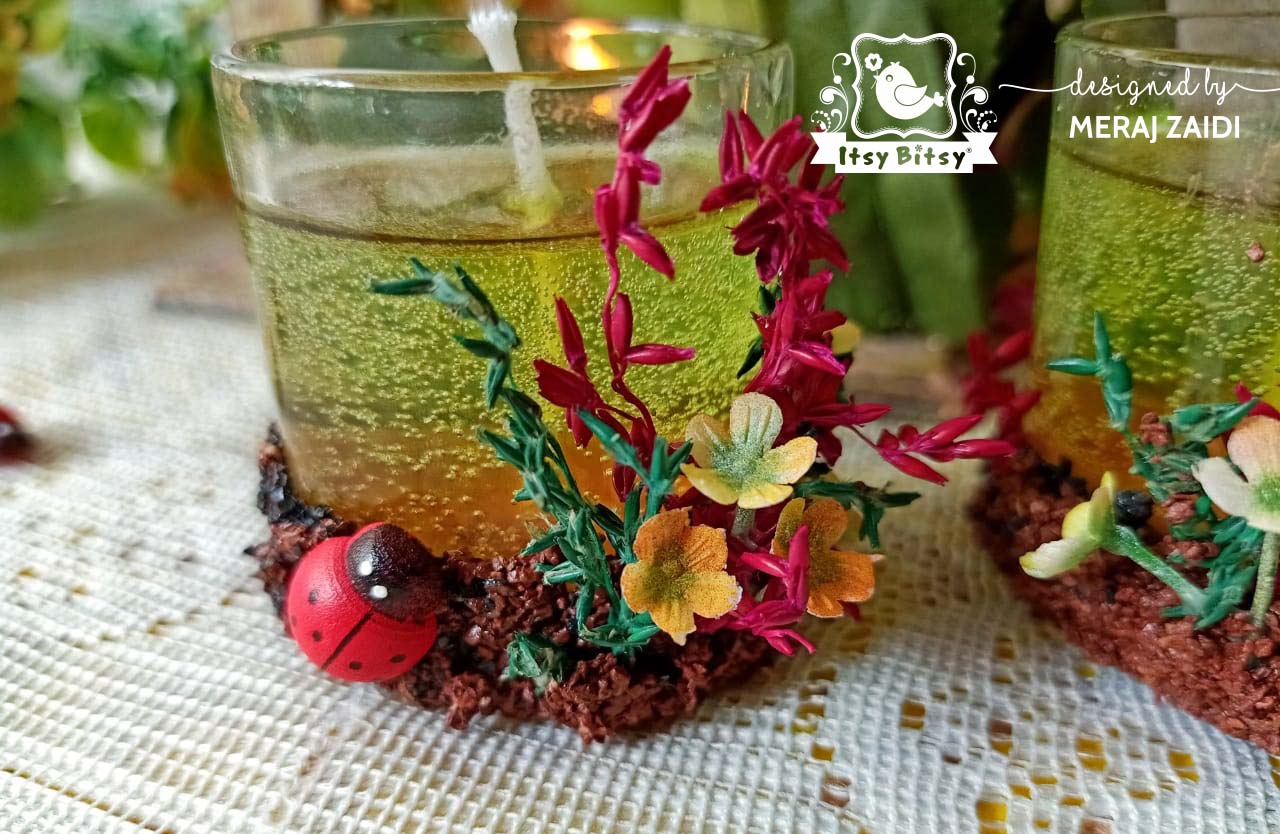
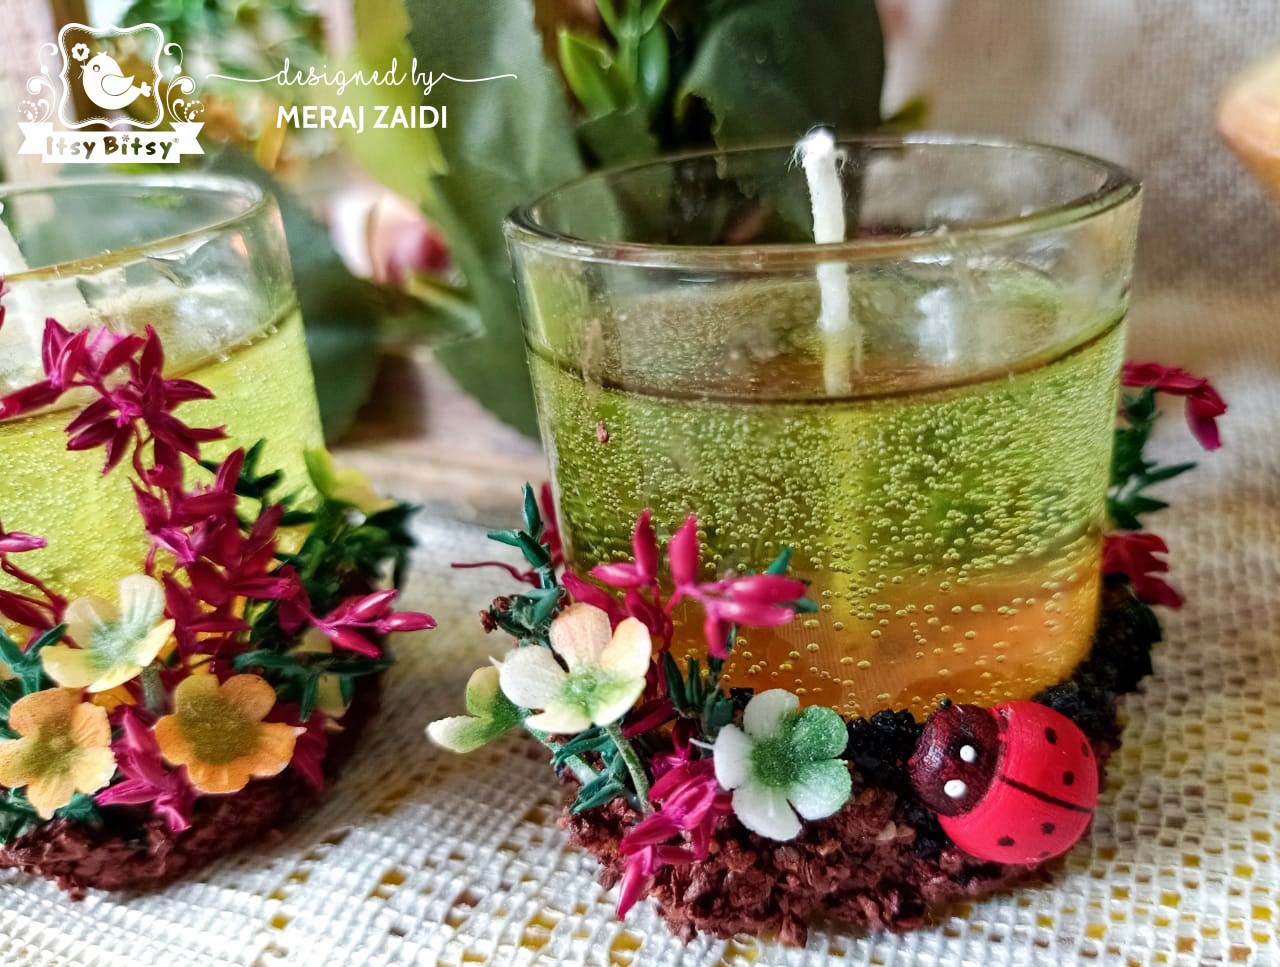
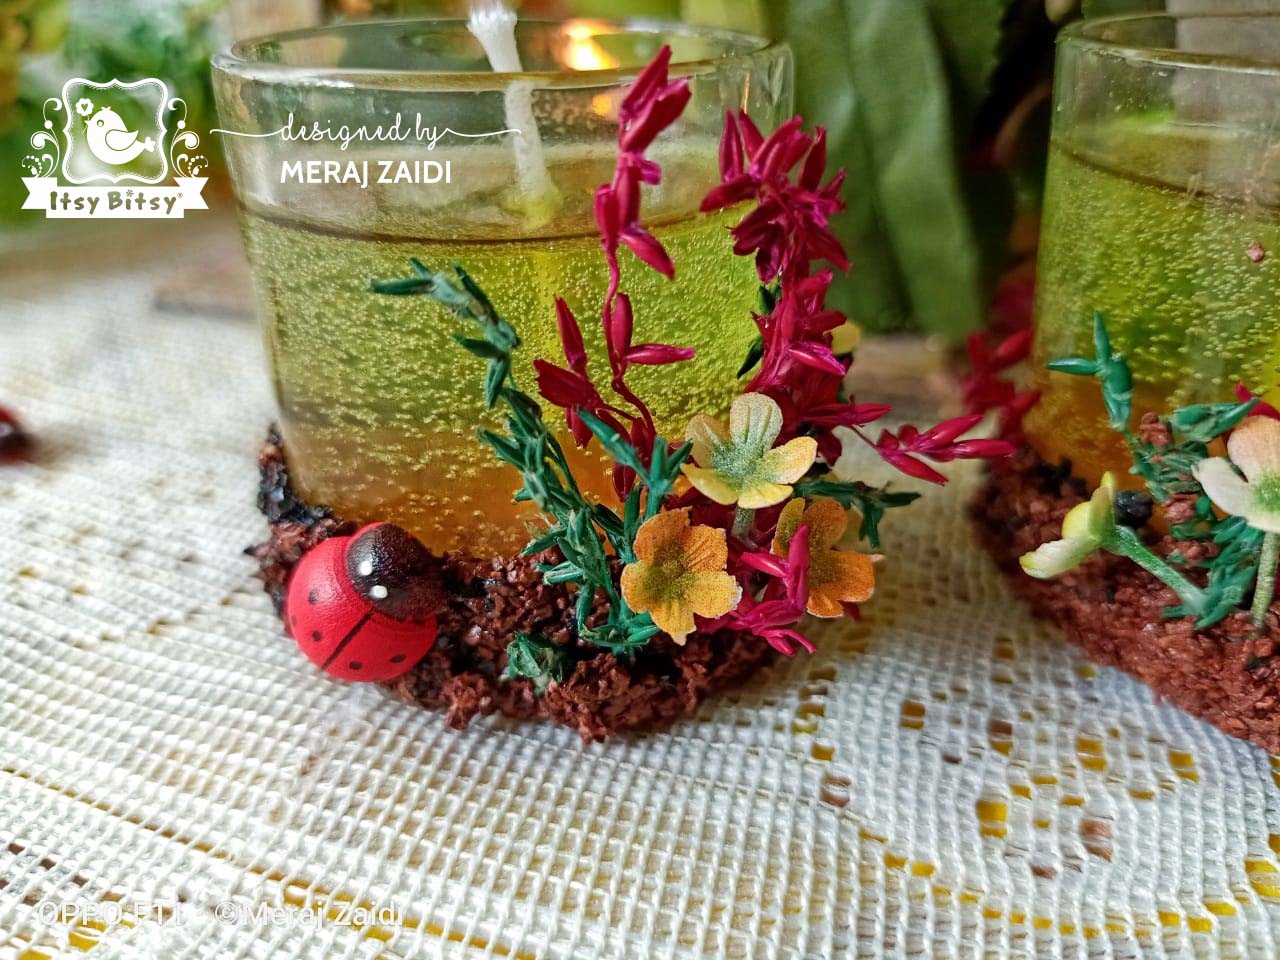
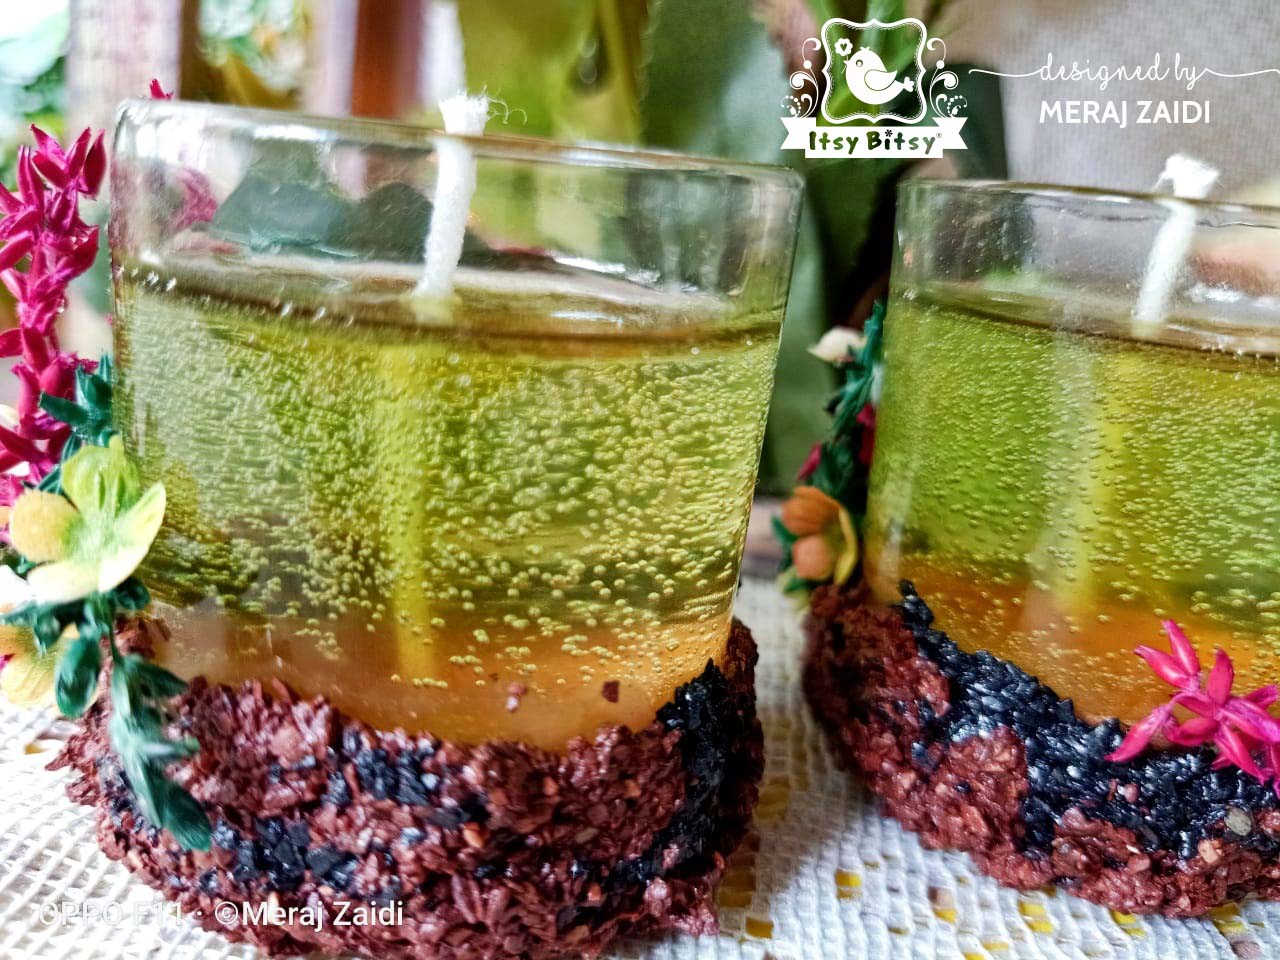
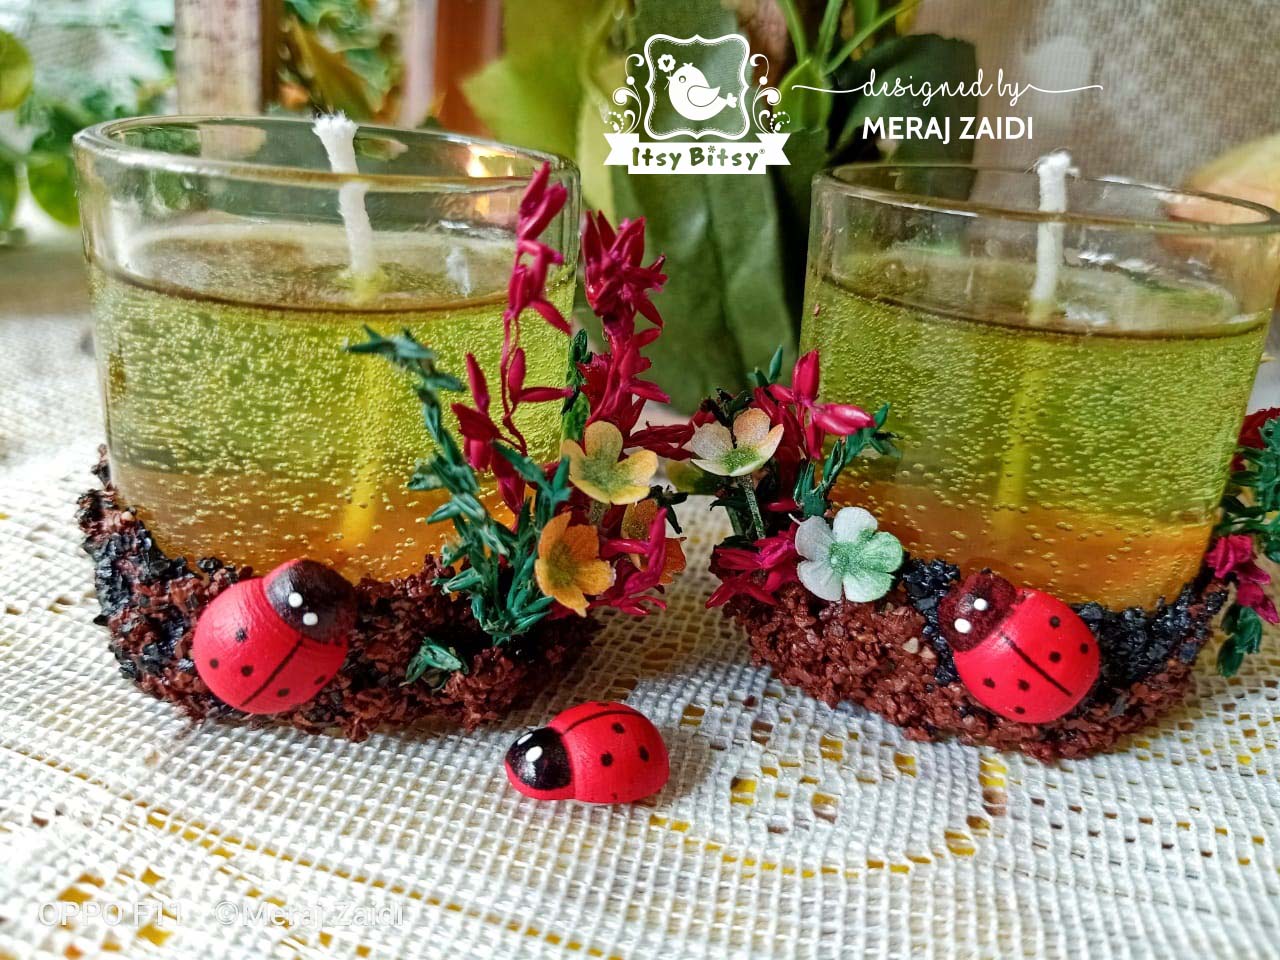
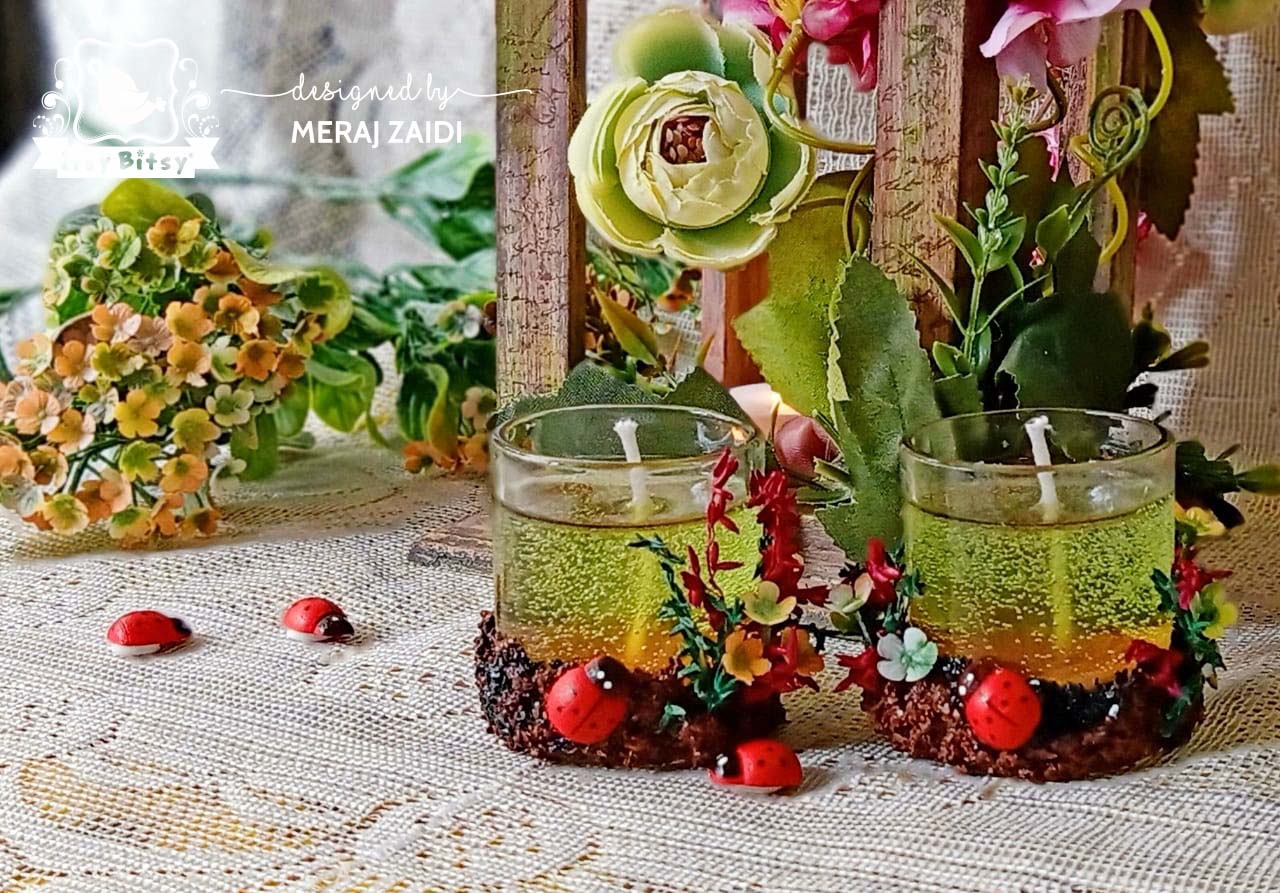
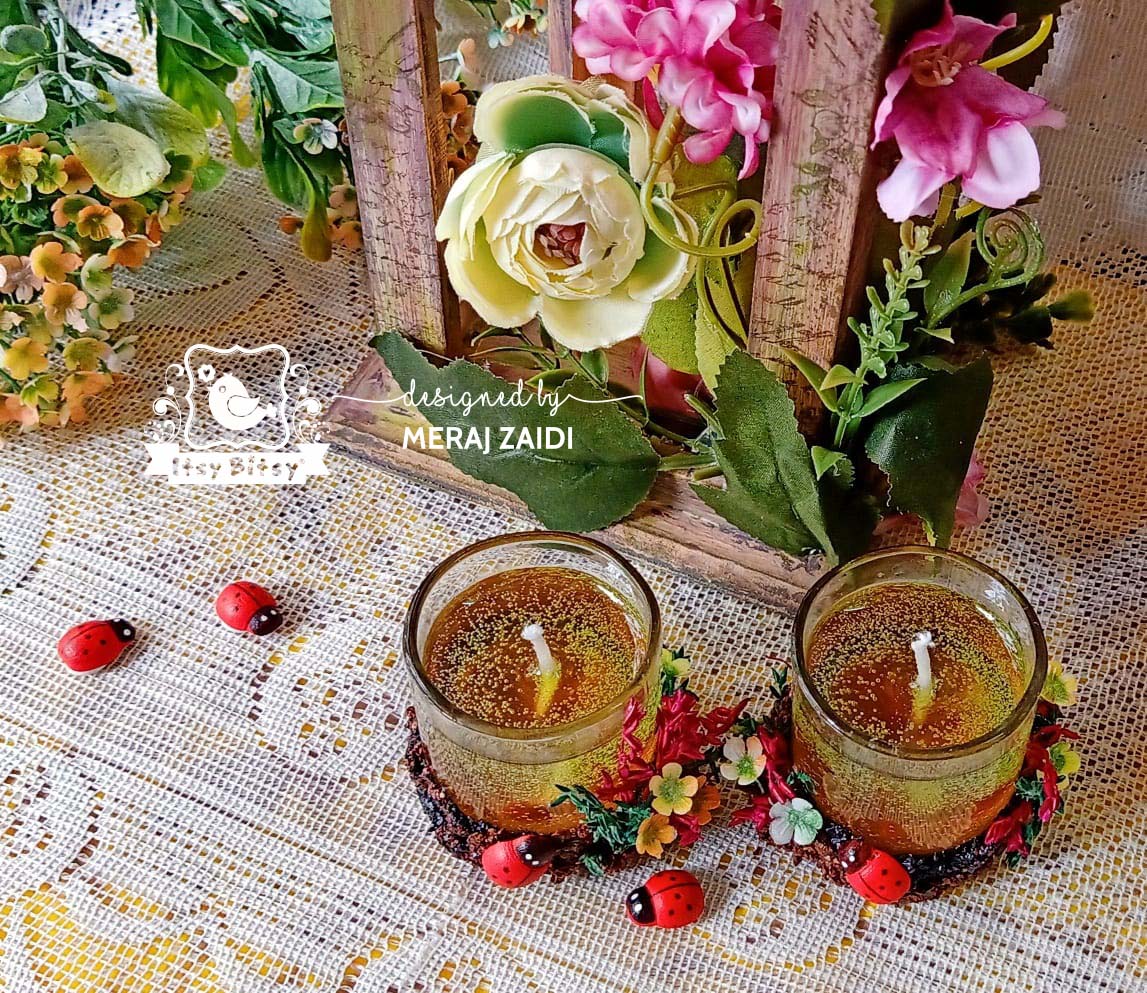
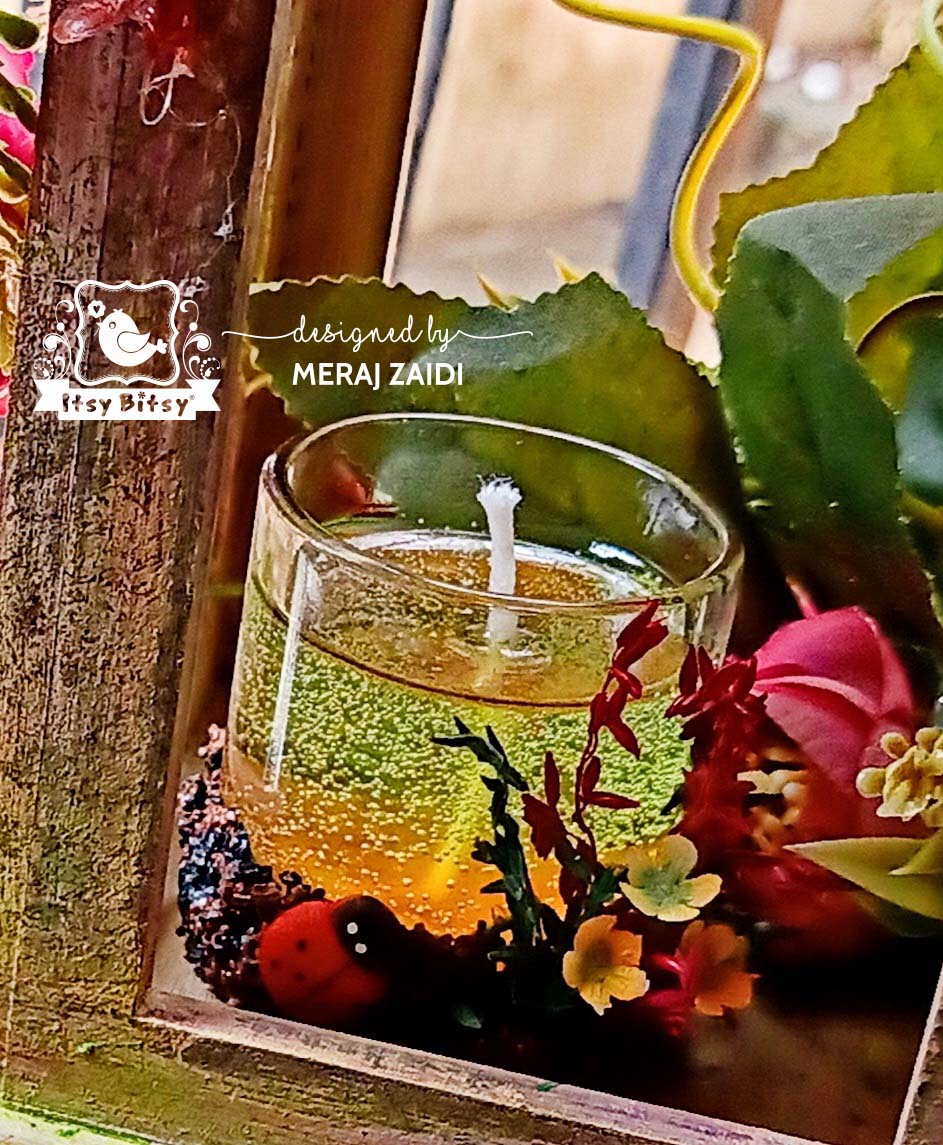
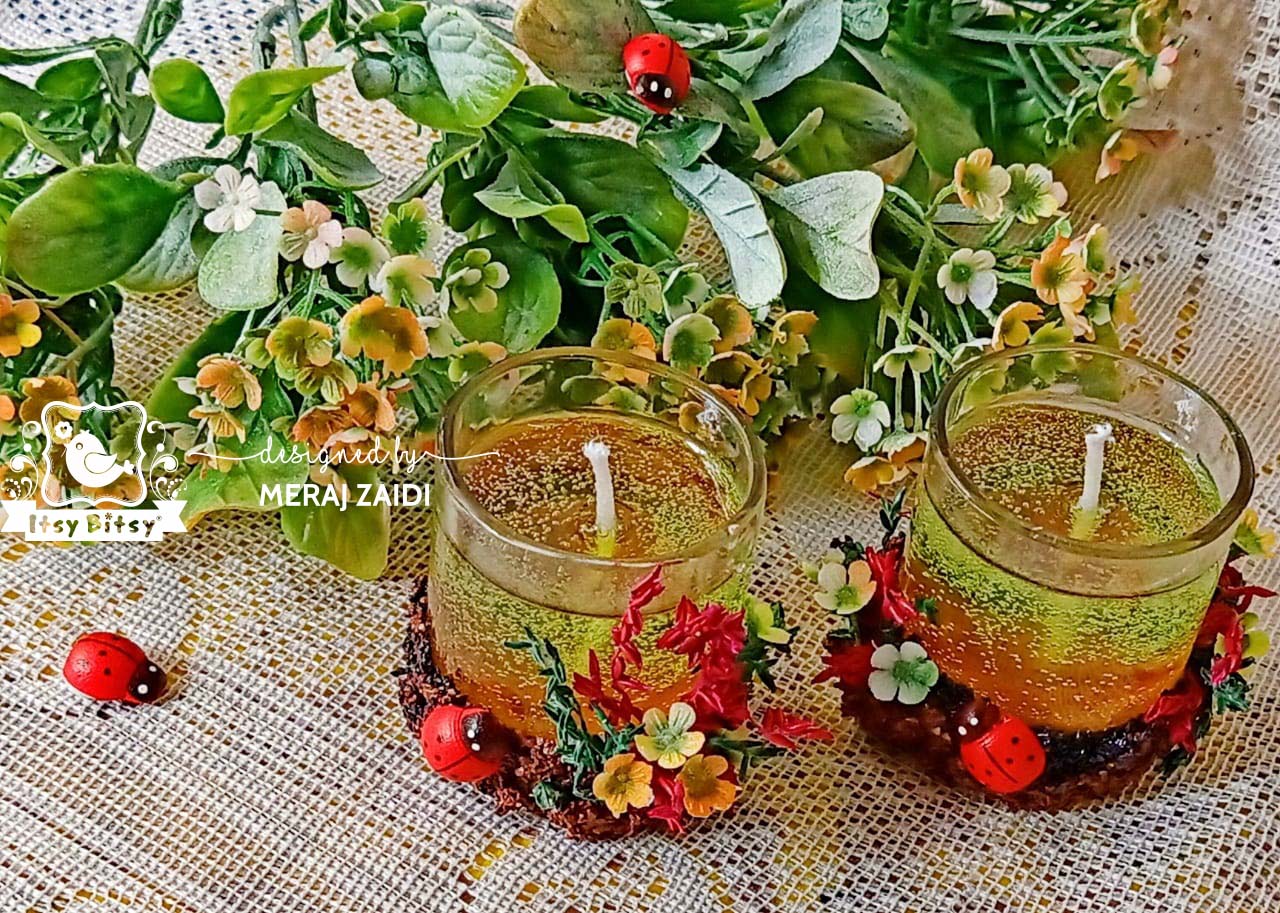
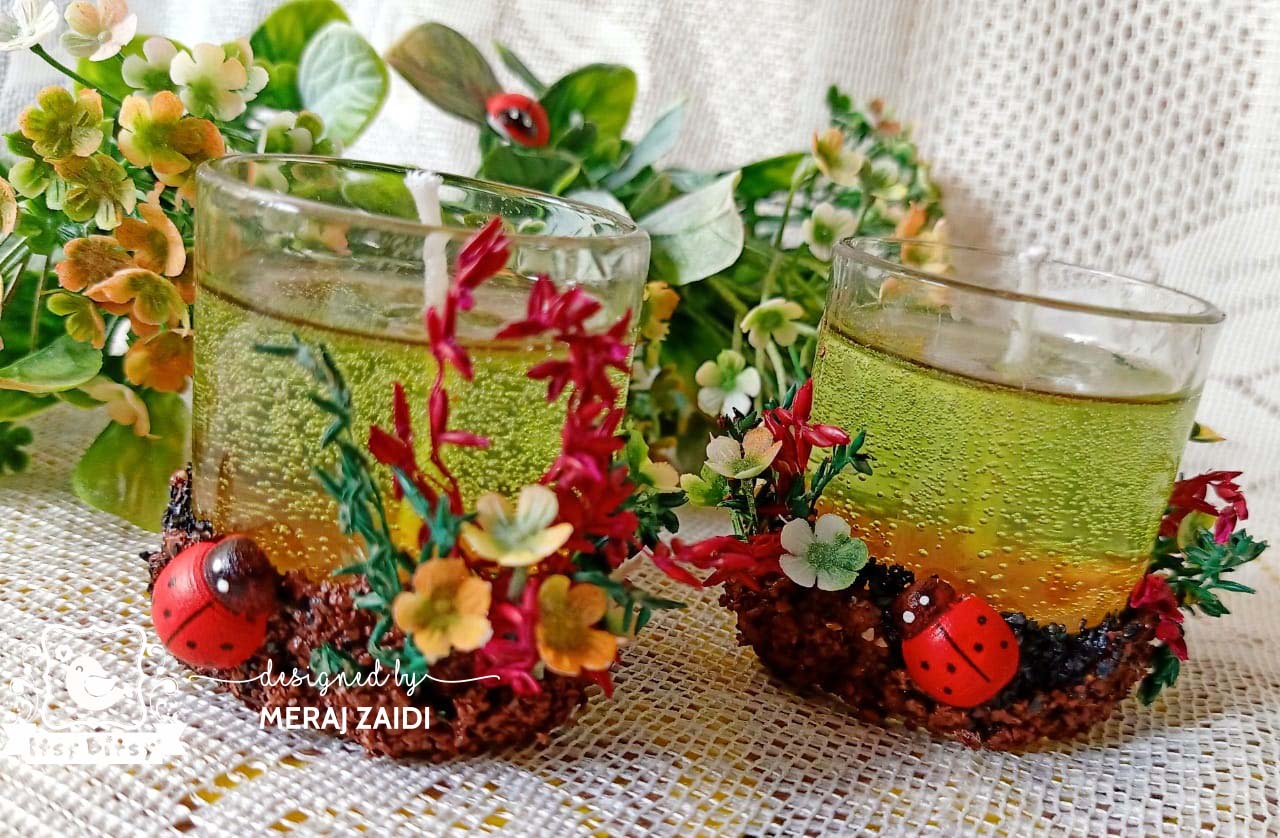
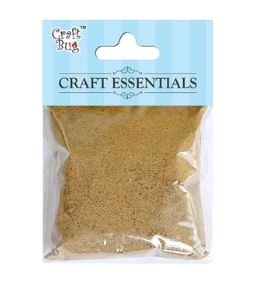
Now pour in some dry sand into it. On the outer side,over the dried texture paste I adhered some small artificial flowers too to add more beauty and vibrance to it. The cute little ladybirds are the cutest things sitting on the base :)
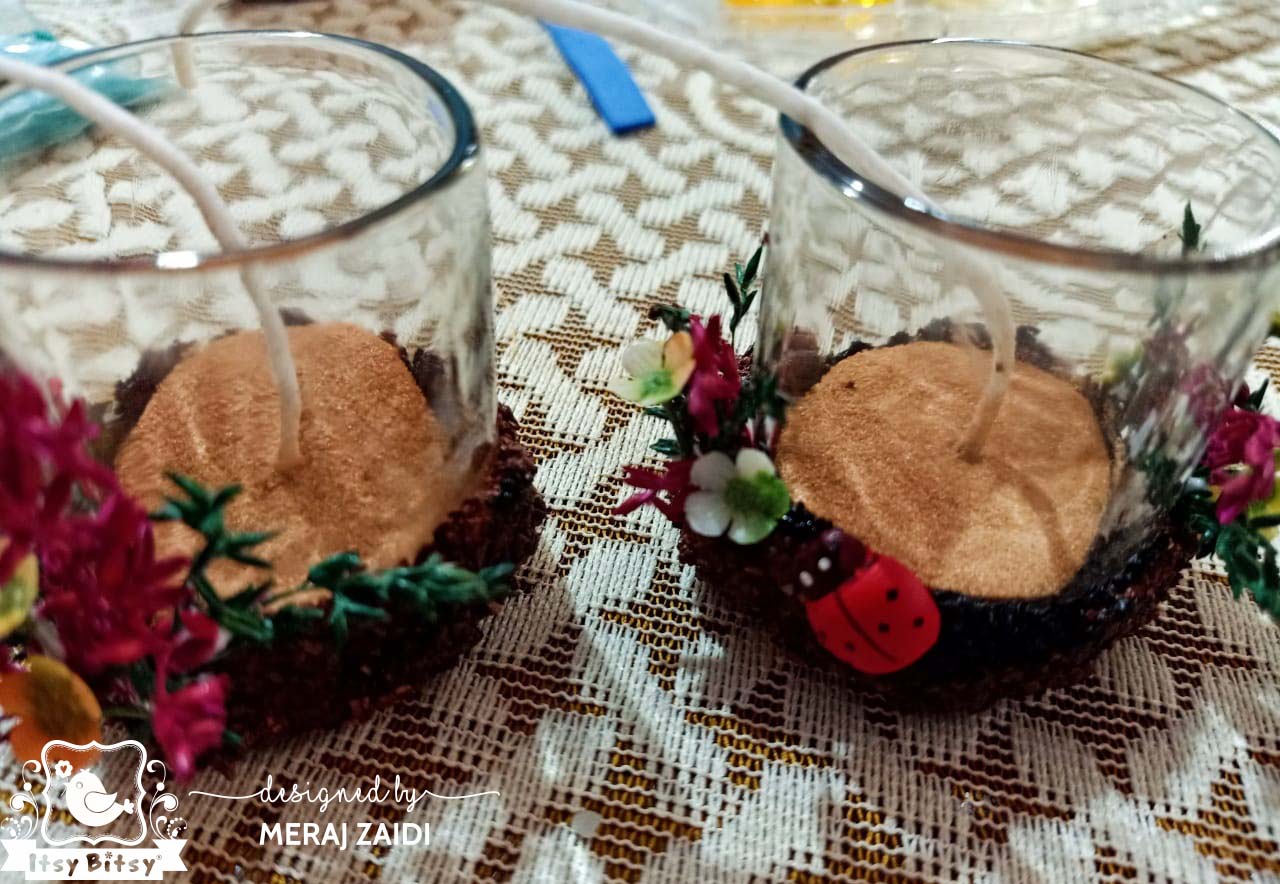
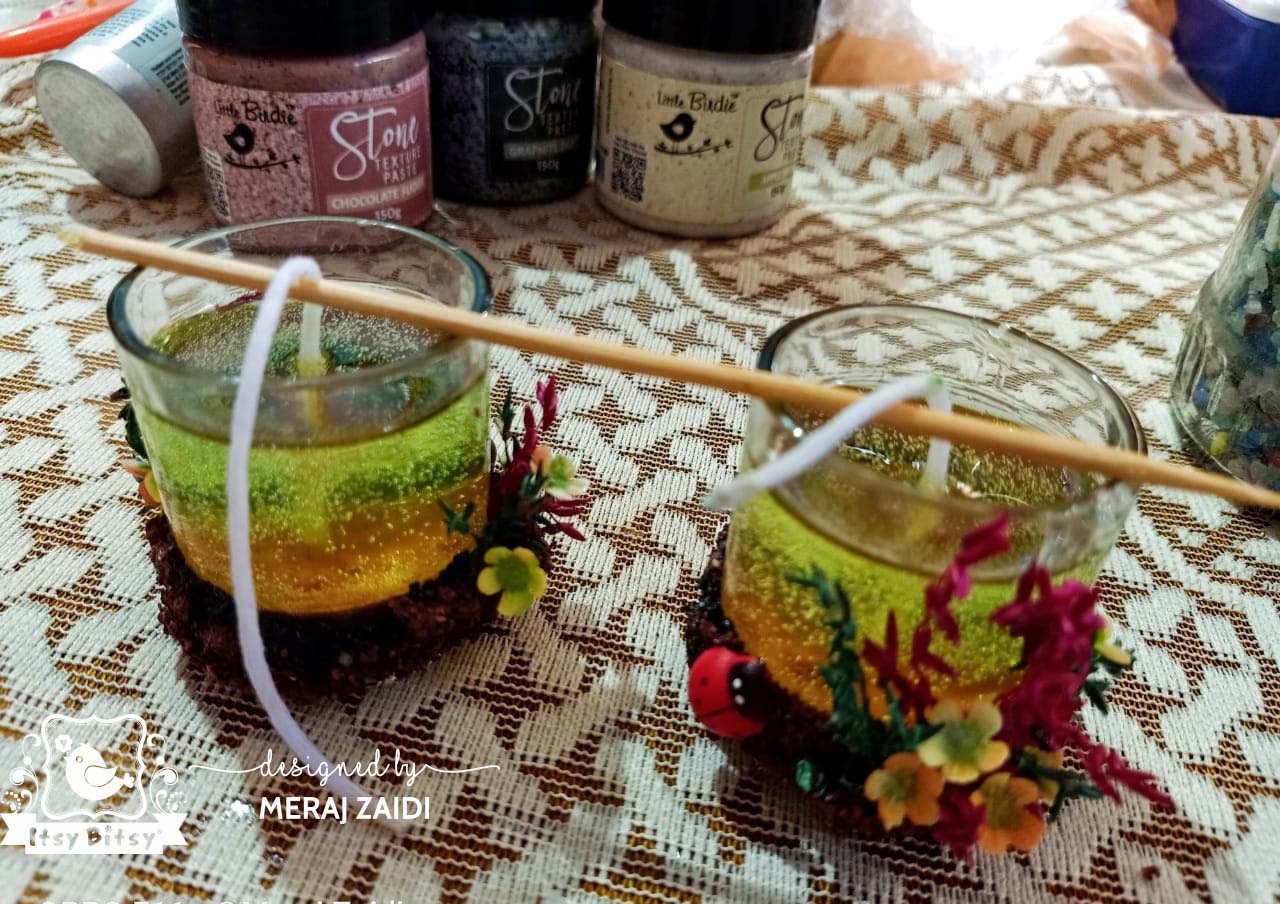
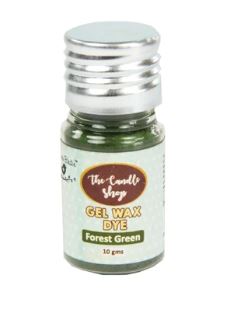
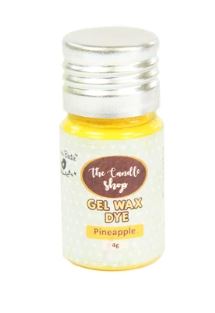
Now take some gel wax, melt it in double boiler, add some gel colours and pour it into the glass containers. To hold the wicks in centre ,give a support to it with either toothpicks or skewers until the gel sets. It takes about an hour for gel to set .
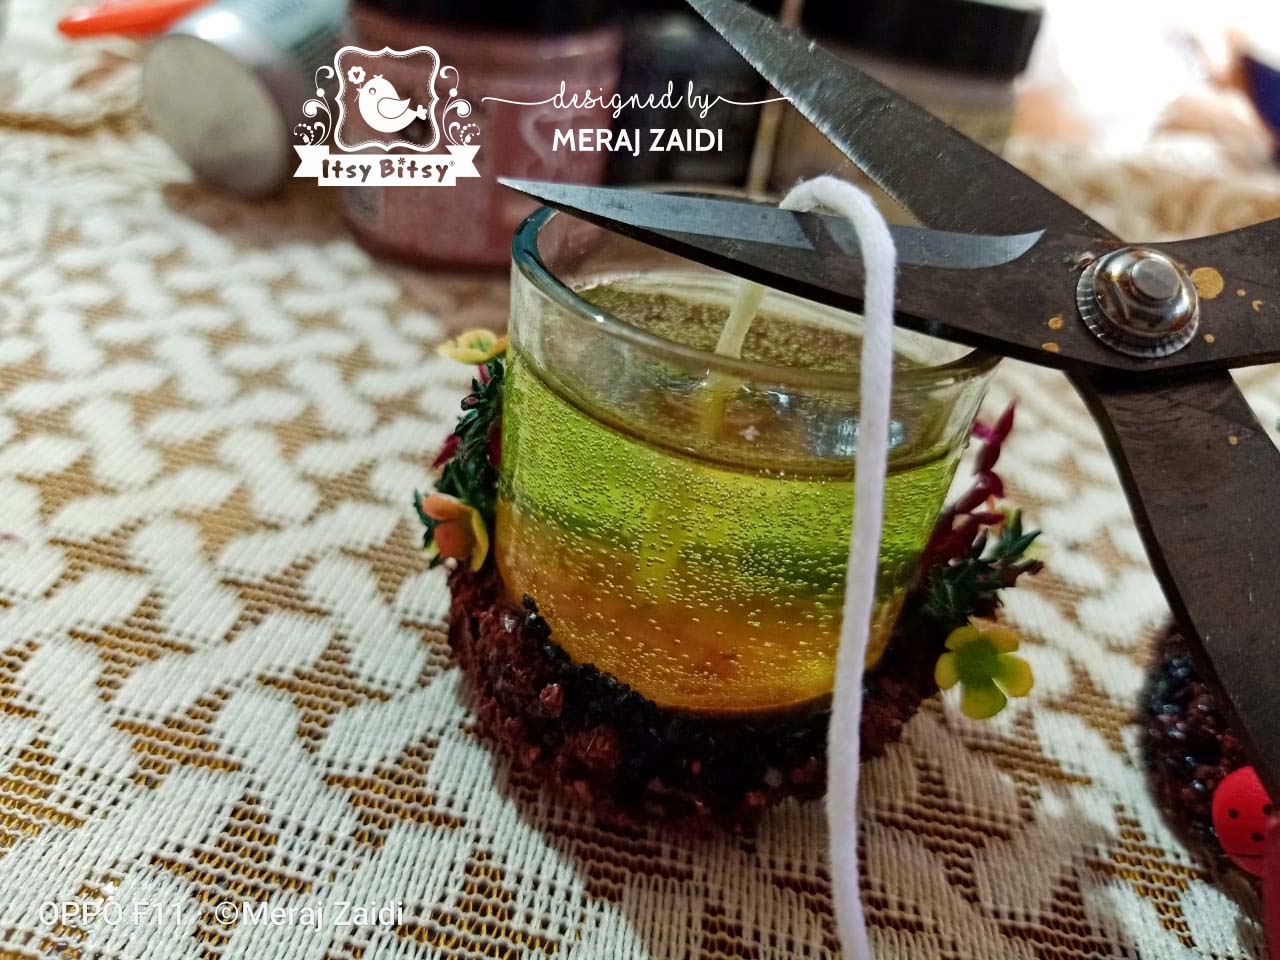
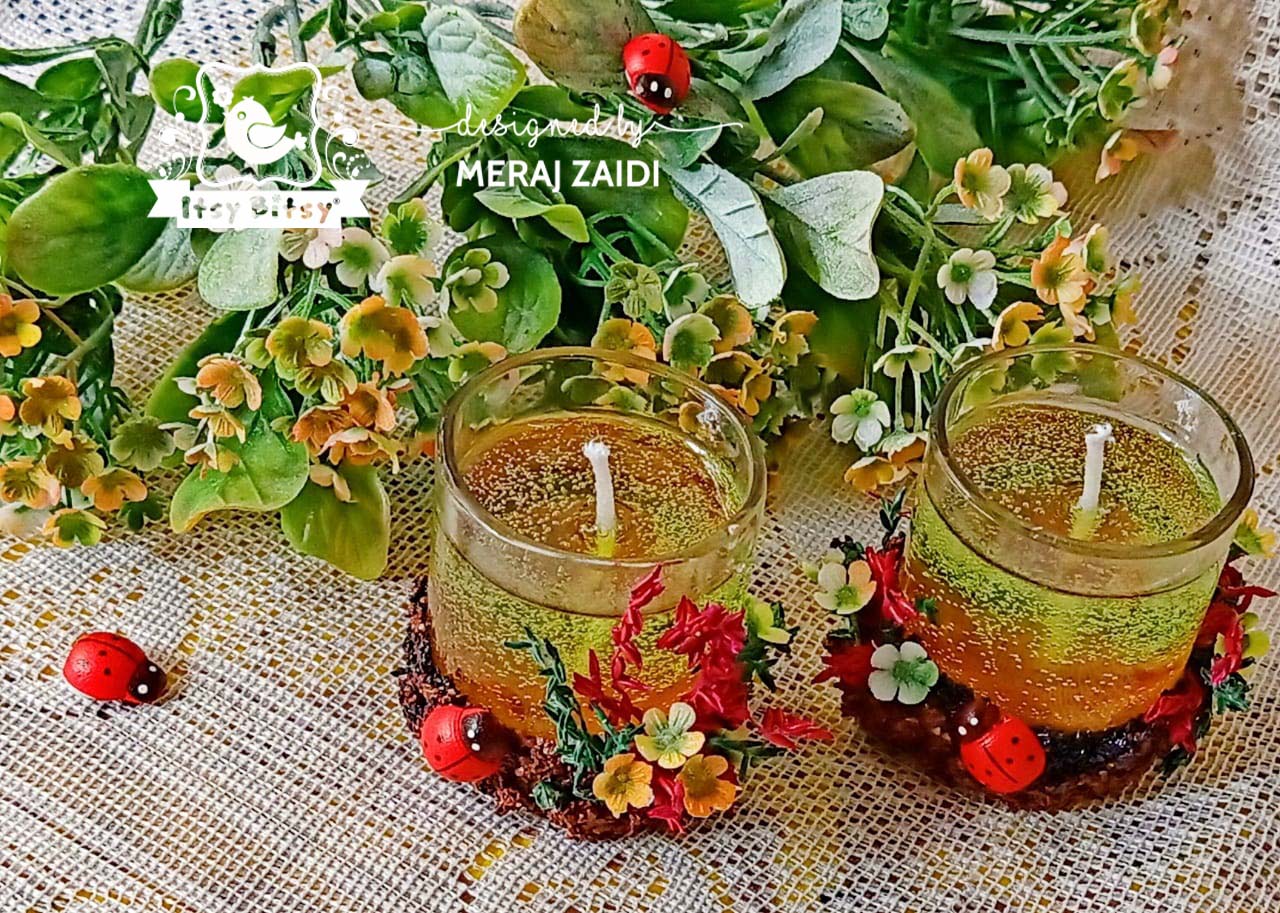
Once the gel wax sets, trim off the extra wick. Your candle is ready to light up your house with smiles :)
Hope you liked the tutorial and enjoyed going through it. Do create and share your projects with us in the ongoing Itsy Bitsy Blog Challenge 25.
Below are the detailed close-up pics with different angles.
The list of material is mentioned below :

Thank you so much for stopping by. Wish you all a very very Happy and Prosperous Diwali ...
Luv, Meraj :)
I am sure you all must be busy preparing for the Diwali celebrations that brings in with it so much happiness and joy. Gifting each other is one of the many adorable gestures one sees during this season. Many a time we all get lost in the confusion of what to gift especially to the most special people in our lives. And I am sure the idea of creating something handcrafted does not only bring the smiles on the giver and reciever's faces , but along with it, it also conveys the message of how special that person is to you because when you create something handmade, it is filled with so much love and thoughtfulness for the person you are making it for. Nothing can compare to a handmade gift made with love, its priceless. Inspired by this Idea of gifting I incorporated Little Birdie's Stone Texture Paste into a Gel Candle that can be made so easily using the awesome supplies from Itsy Bitsy.

So here we go! To start making a Gel Candle, choose a glass container of your choice. There are lots of designs and shapes available in IB physical stores.

I have taken two colors of Stone Texture Pastes. The description is in the material list down the post below.

With a spatula start applying the StoneTexture Paste on the base of the glass. Apply both the colors overlapping each other in some places. Load your spatula generously and apply thick coats of it.

Before the Stone Texture Paste dries up, take some dry ferns, cut them into small parts and quickly insert them into the layers of Stone Texture Pastes. Dry fern is also available in IB physical stores.

Stone Texture Paste dries very hard and hence is very sturdy and strong and will hold the ferns very firmly.

Then take a wax coated wick, apply glue at its base and adhere it in the center of the glass base as shown in the picture below.

Now pour in some dry sand into it. On the outer side,over the dried texture paste I adhered some small artificial flowers too to add more beauty and vibrance to it. The cute little ladybirds are the cutest things sitting on the base :)

Now take some gel wax, melt it in double boiler, add some gel colours and pour it into the glass containers. To hold the wicks in centre ,give a support to it with either toothpicks or skewers until the gel sets. It takes about an hour for gel to set .

Once the gel wax sets, trim off the extra wick. Your candle is ready to light up your house with smiles :)

Hope you liked the tutorial and enjoyed going through it. Do create and share your projects with us in the ongoing Itsy Bitsy Blog Challenge 25.
Below are the detailed close-up pics with different angles.


The list of material is mentioned below :
Thank you so much for stopping by. Wish you all a very very Happy and Prosperous Diwali ...
Luv, Meraj :)
Absolutely stunning ������
ReplyDelete